KB8: Create a Windows XP CD with slipstreamed SP3
Get nLite
For the CD image creation, you have to get nLite, at least version 1.4.5 beta2. It does not only allow you to integrate Service Packs into CDs, but also offer the possibility to apply various modifications, like an integrated CD key. After you downloaded and installed nLite, start the application.
Slipstreaming SP3
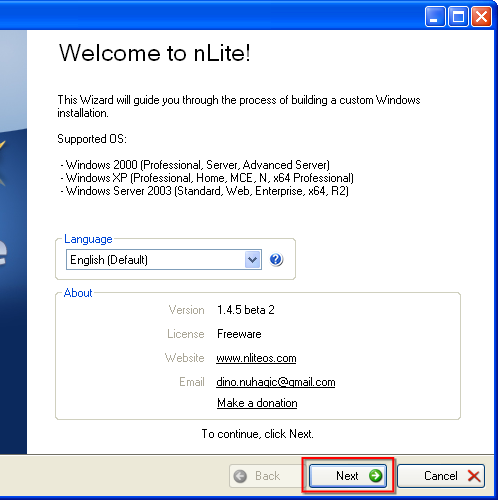
Choose your language, click next.
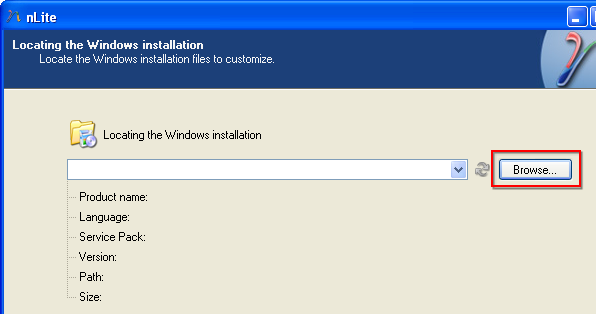
Insert your Windows CD. Click “Browse…”.
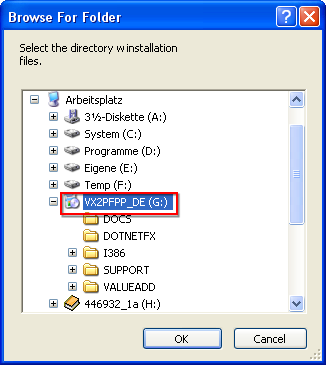
In the following Window, select the drive that contains the Windows XP disc. It should be displayed as typical setup icon.
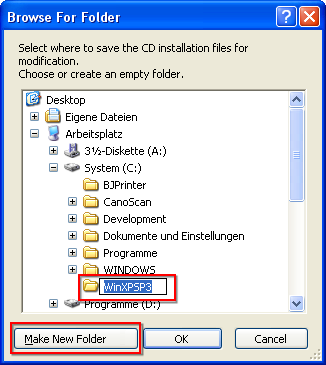
Ignore the warning, and in the next dialog select C:\ and create a new folder called “WinXPSP3”. You should have at least 1GB free space left. You may also choose a different location to store the temporary data of course.
Now nLite will copy all files from the CD to your hard drive. After the process has finished, click “Next”, as well as in the following screen.
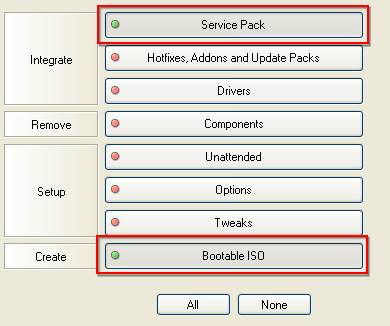
You should now see a page with a lot of buttons on it. Decide for the first one (Service Pack) and last one (Bootable ISO).
After you pushed them, there should be a green “light” on the left side. Click “Next” again.
Now you have to specify the location of the Service Pack by clicking on “Browse”. If you didn't download SP3 yet, do it now.
After finding your file, nLite will unpack the Service Pack and apply it to the files temporarily stored on your hard drive. This may take a while. It will not update your operating system. When done, click “Next”.
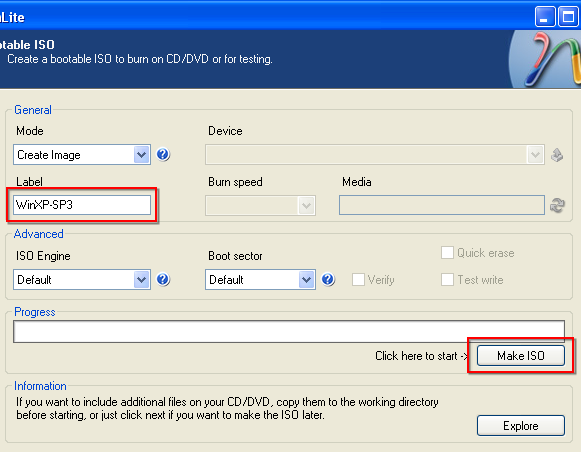
Now enter a label for your disc, and select “Make ISO”. nLite will then ask you for a location to store the file. The advantage of making an ISO is that you can burn it as often as you want, or also mount it as virtual drive with applications like Daemon Tools.
Once it has finished, select “Next”, “Cancel” or whatever you like, we are done with nLite for now.
Next steps
You might want to delete the temporary files, but not the created ISO image of course. Now you can burn the ISO image with CDBurnerXP or test it using a virtual machine.
