Create Data Disc
A data disc can contain files of any type. You can save .txt, .mp3, .html, or .doc type files to name a few.
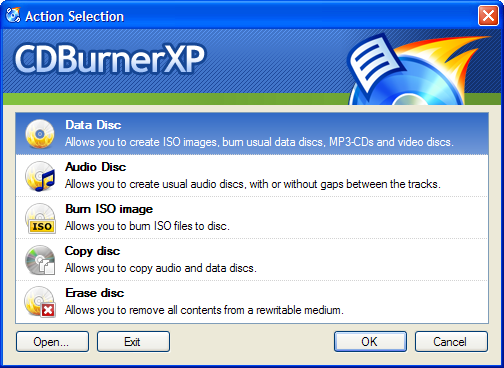
To create such a compilation select Data Disc, from the startup screen.
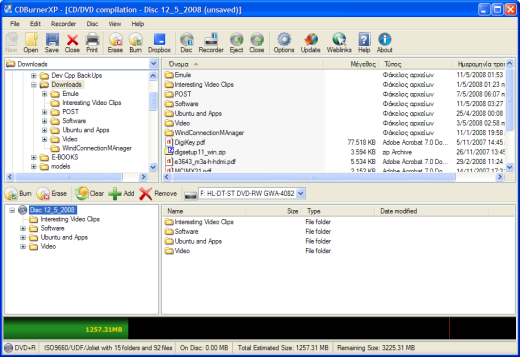
Once you done the above, the main window changes, being split to two parts. This layout can be either vertical or horizontal to fit your preference. You can find this option from the menu View → Tile. Use the “Exlporer Window”, top or left according to the layout you have chosen, to navigate and locate the folder containing the data you wish to copy.
The other window, “Compilation Window”, contains the files to be written on the disc. At the very bottom of the window is a bar which shows the used and available space on the disc and more information is provided on the status bar.
Adding files
To add files or folders to the compilation select the source folder in the folder view (left) or open a folder in the file and folder list using a double click. Then you can select the files you want to copy by highlighting them (press the control key for multiple selection). Click the Add button  , or drag and drop the selection to the compilation at the bottom.
If you have accidentally added something you don't want, select it in the compilation area and click the Remove button  or press “Delete” on your keyboard.
Repeat the Add and Remove procedure as needed or until you have reached the amount of available disc space.
Renaming the disc
You can rename the disc by selecting the root node of the disc (where the name of the disc is shown) and pressing F2. Alternatively, you can change the name using the menu Disc –> labels.
You can also set a default disc name for all new compilations in the Options.
Saving compilation
You can save the compilation click the Save button  , if you intend to burn the same compilation later again, by selecting from the menu File → Save, or Ctrl + S on your keyboard.
You will be presented with a prompt asking you to create a name for your compilation. Enter a name for the compilation and click the Save button.
Burning the disc
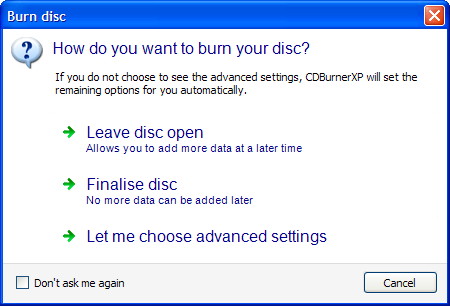
To burn the compilation click the Burn button  , or Ctrl + B on your keyboard, or select from the menu Disc → Burn disc. A new window will appear with three options:
The Leave disc open allows you to add more data later. Read below on how to do that.
The Finalize disc makes the disc read only.
Both these options will start the burning process immediately. To avoid that, select Let me choose advanced settings. Read more on the topic on Burn Options of the help file.
The burn process will begin and take some time to complete, depending on your hardware, the medium and the amount of data to be written. Please wait until the process is finished and a message appears that the operation was completed successfully.
You can now burn the compilation again by selecting  .
.
Otherwise to exit select  .
.
Adding Files to an Open disc
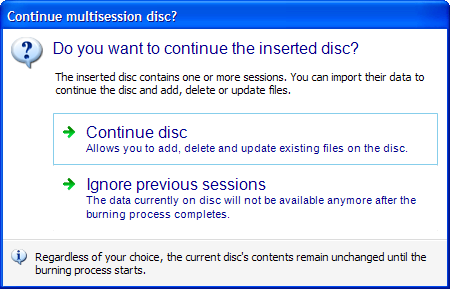
If you have an open disc inserted in your drive, a message will appear asking you if you want to continue the disk, effectively importing the previous sessions, or ignore them.
Once you have chosen, the procedure is the same as creating a new disc, but the files from previous sessions are presented with different color in the Compilation Window. The amount of data is also shown with a different color on the capacity bar.
If you would like to create a disc containing both Audio and Data you should follow the procedure described in the Mixed mode disc part of the help file.
Updating the compilation content
After you opened a compilation, you can update the content if necessary. That is:
- Add all files and folders to the compilation, which have been added to the folders on your hard disc.
- Remove any no longer existing files
- Update all file dates
To update the compilation, right click in the compilation area and choose “Update compilation”. You can also execute the update automatically every time you open a compilation (see Options –> Data).
File System
There are several file systems you can choose for the disc. Each of them is used for different applications. To select the appropriate file system choose from the menu Disc → File System. See the File System part of the help file, for more information.
Version requirement
This article applies to version 4.0.027 or higher.
In older versions of CDBurnerXP the selections are somewhat different, since it has been redesigned. For multisession discs choose Disc → Import session….


